Whenever a new Android app update drops, the app gets better in terms of performance or security. Not only that, there are some major interface changes, the addition of features, the inclusion of new events (if it’s a game), and so on.
So you get it, right? It’s highly important to keep your apps up-to-date to not miss out on anything new. Now, there are four ways to update Android apps. Two of them are automatic, while the other two are manual.
I’ll list the steps for each of the methods.
1. Manually Update All Android Apps
This is the most efficient way to update apps if you do not have auto-update turned on already (more on that later).
This method requires no manual input except that you have to press the “Update All” button. Here’s how to do that:
- Open the Play Store.
- Tap on your profile icon.
- Tap on “Manage apps & device”.
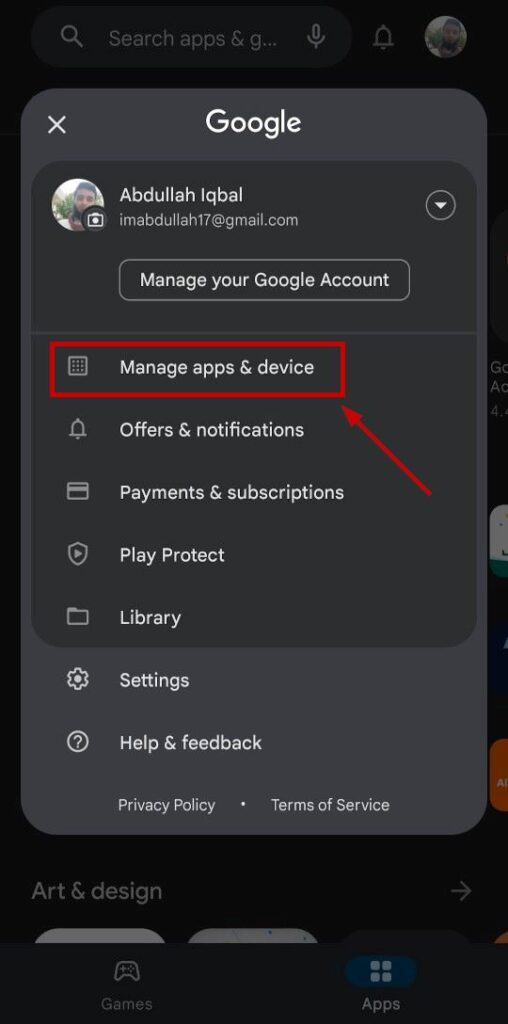
- Now you can either tap “Update all” here to update the apps or tap “See details” to check which apps have gotten a new update.
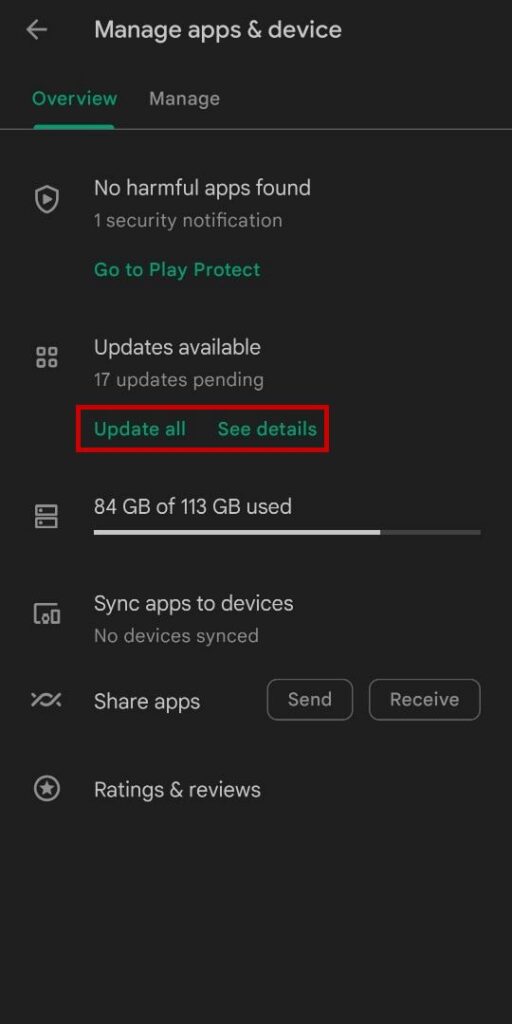
- You’ll land on the following screen after tapping See details:
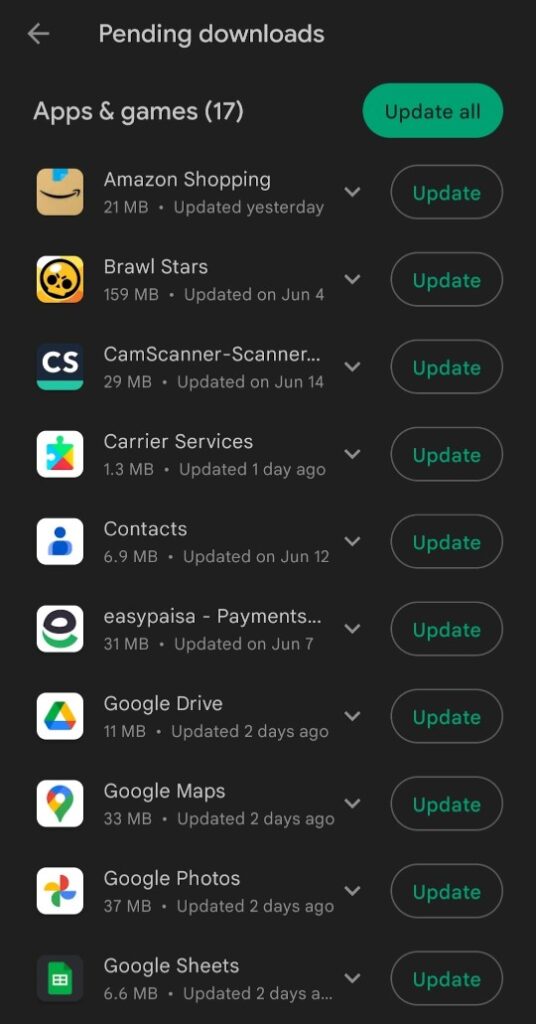
- Tap the Update all option to start updating them.
2. Manually Update Individual Android Apps
As the heading title suggests, this is the method to update a single app as opposed to updating all of them at once. The steps for this are exactly the same as the previous method, but there’s a slight change in the end.
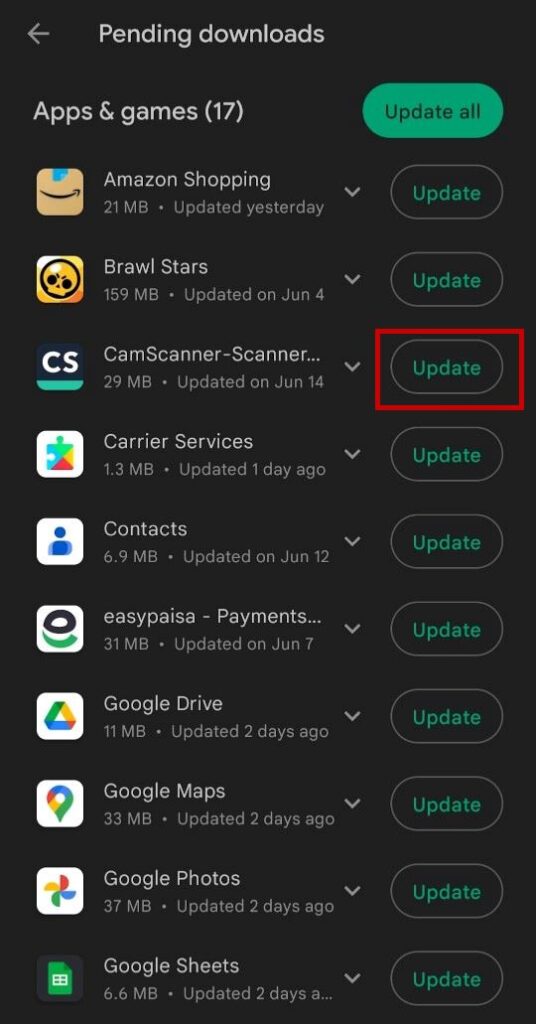
So, instead of tapping Update all on the See details screen, you will have to tap Update next to the app you want to update.
For instance, let’s assume I just want to update CamScanner and not any other app. Now, I’ll simply tap on Update next to CamScanner, and it’ll start updating.
As simple as that!
3. Automatically Update Individual Android Apps
If you want to always keep specific Android apps up-to-date, then this method is for you.
Let’s consider CamScanner again.
Now, if I want the app to always update automatically, then I need to turn on the auto-update option for it.
Follow the steps, and you’ll see how:
- Open the Play Store.
- Type CamScanner in the search bar.
- Tap on it from the search results.
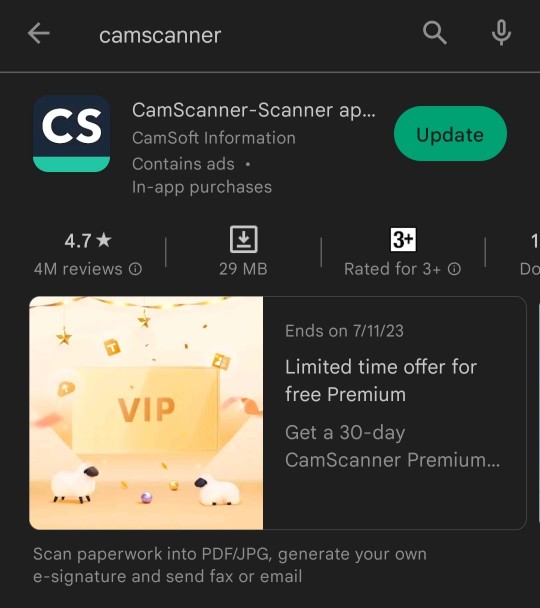
- Tap on the three vertically dotted menu icons on the top right.
- Check the box that says “Enable auto update”.
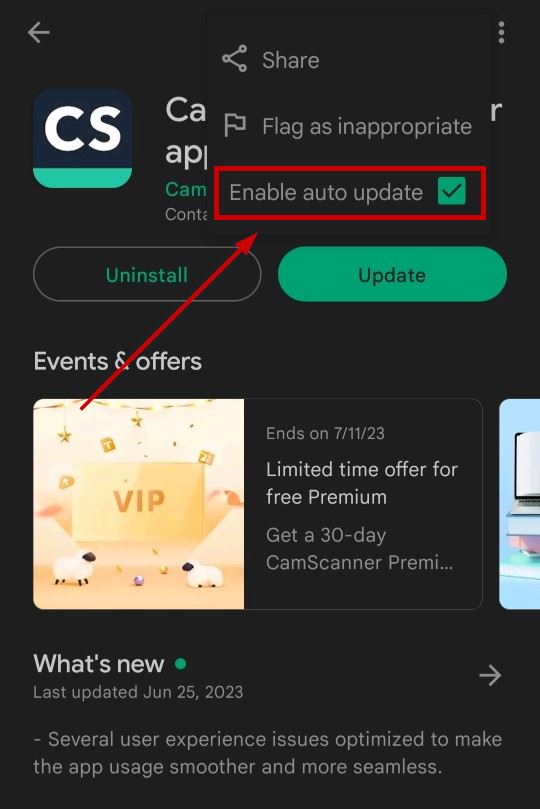
- The app will now update automatically whenever a new version comes out.
4. Turn on Auto-Update in Google Play Store
Enabling the auto-update option for every app separately will consume a lot of time. Therefore, the best way is to turn on the auto-updates option in the Google Play Store.
Doing this will update all the applications automatically whenever they get a new update from their developers.
Here’s how to enable this option:
- Open the Play Store
- Tap on your profile icon.
- Tap on Settings.
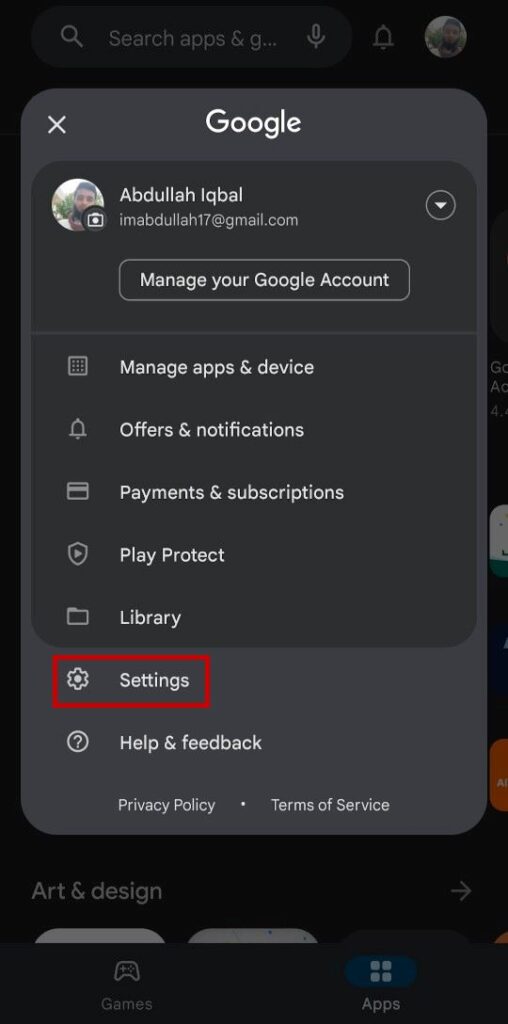
- Tap on Network Preferences.
- Select Auto-update apps.
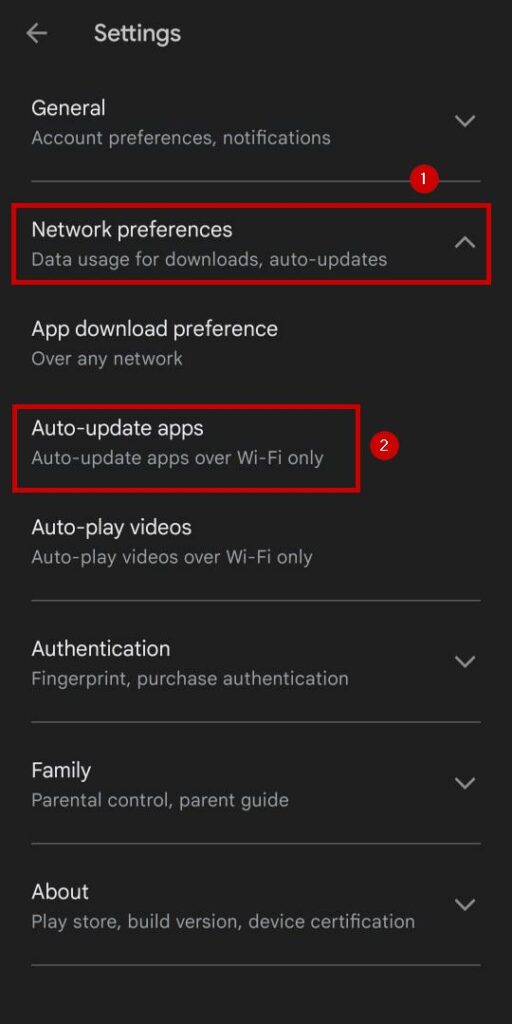
- Now you can either select the “Over Wi-Fi only” or the “Over any network” option.
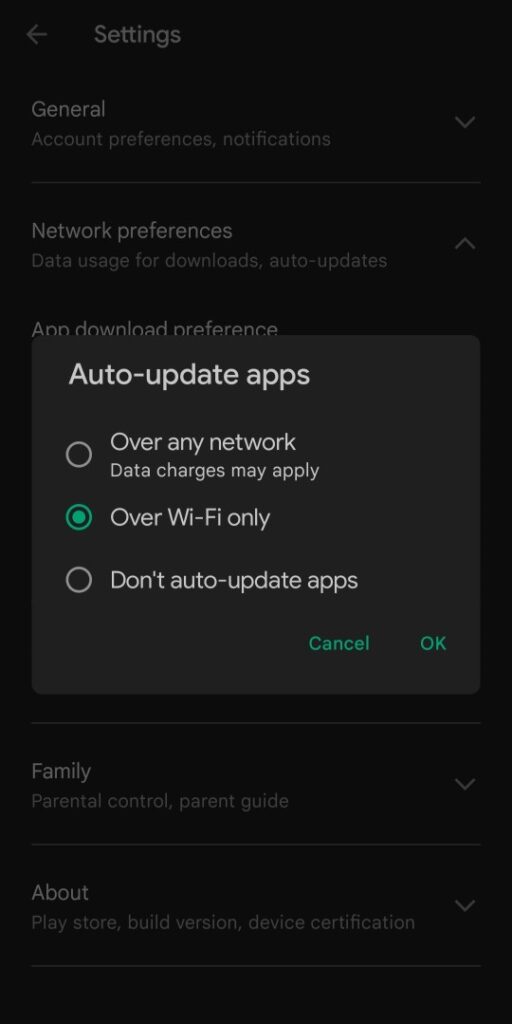
- Once done, the preference will be saved automatically.
Now, whenever an app gets an update, the Google Play Store will update it automatically without your intervention.
I suggest selecting the Over Wi-Fi only option, as larger apps can use a significant amount of mobile data while updating.
And this was all about how you can update Android apps on any smartphone. The user interface can vary for everyone depending on their device and Play Store version.
Read more: (Fixed) Why iPhone Keeps Saying Call Failed?
Featured Image by trustedreviews.com


